Introduction
This guide will teach the reader how to chill glasses for fine spirits tasting using nine proven methods. By mastering these techniques, one can preserve the delicate aromas and flavors of premium spirits, ensuring an optimal sensory experience. The information presented is valuable because temperature control influences the volatility of aromatic compounds, which directly affects perception. Readers will gain confidence in selecting tools, preparing glassware, and troubleshooting common issues.
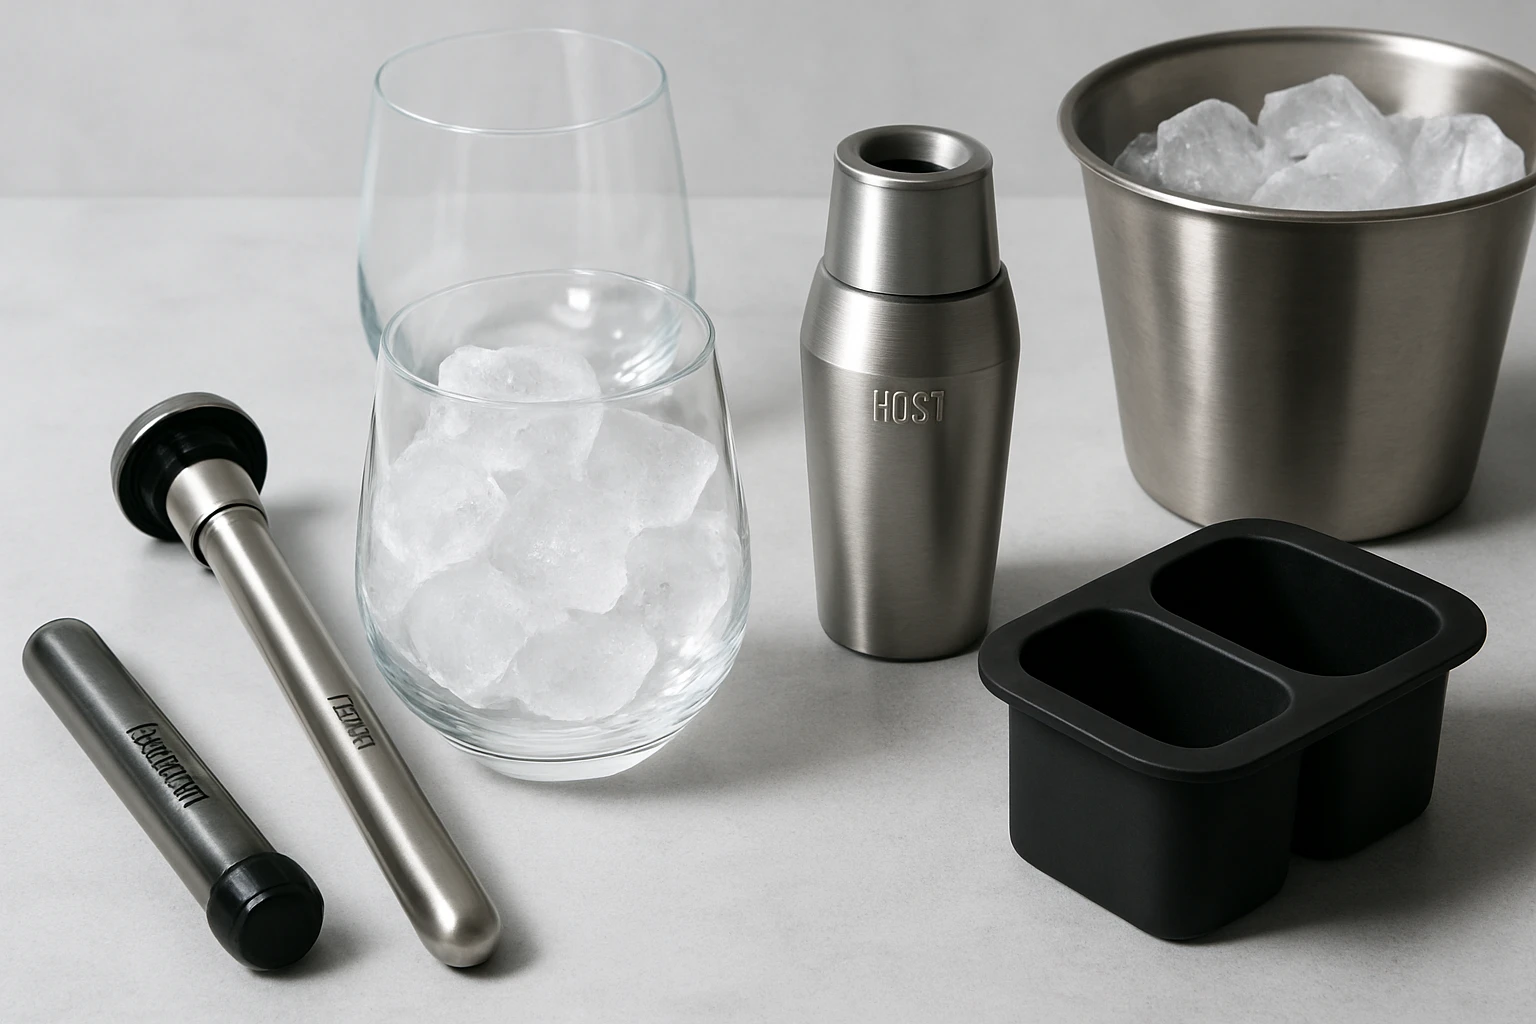
What You’ll Need
- Stemless or low‑profile glasses suitable for spirits
- Dedicated glass chillers or freezable tumblers
- Ice bucket, tongs, and a clean cloth
- Refrigerator or freezer space for pre‑chilling
- Optional cooling sleeves or stone chillers
Below are recommended products that serve as effective tools for several of the steps.
Step 1: Select the Appropriate Glassware
Begin by choosing a glass that complements the spirit being tasted. For whiskey, a Glencairn style glass concentrates aromas, while a narrow‑rimged brandy snifter allows gentle diffusion. Ensure the glass is clean and free of residues that could alter flavor. If a stemless design is preferred, verify that the chosen glass fits within the dimensions of any chiller that will be used later.
Step 2: Use a Dedicated Glass Chiller
One of the most reliable methods is to employ a purpose‑built chiller such as the VoChill Stemless Wine Glass Chiller. This device actively chills a stemless glass for over an hour indoors and up to 45 minutes in shaded outdoor heat. Its separable, refreezable cradle fits a wide range of standard stemless shapes, and the magnetic connection provides a smooth, reliable feel. At a price of $44.95, it holds a rating of 4.6 out of 5 stars based on 683 reviews, indicating strong customer satisfaction. The chiller eliminates the need for ice, preventing dilution, and preserves the pure character of the spirit.
Step 3: Employ Freezable Gel‑Filled Cups
For a more portable solution, consider the Host Wine Freeze Cups. These stemless tumblers contain a proprietary cooling gel that solidifies when frozen. After a two‑hour freeze, the cups maintain the ideal temperature for whites, roses, and reds, and they perform equally well with spirits when the desired temperature is between 43°F and 60°F. Each cup holds 8.5 oz, features an insulated silicone band for comfortable handling, and is BPA‑free. Priced at $19.96 for a set of two, the cups enjoy a rating of 4.4 out of 5 stars from 1,120 reviewers. They are especially useful for outdoor gatherings where a traditional ice bucket is impractical.
Step 4: Choose Double‑Wall Insulated Glasses
Another effective tool is the Host Stemless Freezable Wine Glass. This model combines double‑wall insulation with a freezable gel layer, providing up to several hours of chill without external ice. The design is lightweight, shatter‑resistant, and suitable for both indoor tasting sessions and casual patio use. At $12.99 per glass and a rating of 4.5 out of 5 stars from 3,014 reviews, it offers excellent value for enthusiasts who require multiple glasses. The insulated construction also reduces condensation, keeping the hand dry and the tasting environment tidy.
Step 5: Utilize a Freezable Glass with Lid for Travel
When tasting spirits on the move, the Host Freeze Wine Glasses with Lids provide a secure, travel‑ready option. The set includes two 8.5 oz tumblers with silicone grip bands and snap‑on lids that prevent spills and keep insects out. After freezing for two or more hours, the active cooling gel maintains temperature for several hours, making it ideal for road trips, beach outings, or camping adventures. The glasses are priced at $18.99 for the pair and have a rating of 4.3 out of 5 stars from 2,151 reviews. Their durability and convenience outweigh the higher cost compared with traditional glassware.
Step 6: Prepare an Ice Bucket with Tongs
If a chiller is unavailable, an ice bucket remains a classic method. Fill a bucket with crushed ice, add a splash of water to lower the temperature, and use stainless‑steel tongs to handle the glasses. This technique rapidly reduces glass temperature but introduces a risk of dilution if condensation drips into the spirit. To mitigate this, wrap the glass in a thin cloth before submerging, or use a dry ice alternative for a non‑diluting chill.
Step 7: Pre‑Cool Glasses in the Freezer
For a simple, equipment‑free approach, place clean glasses in the freezer for 15‑20 minutes before the tasting. This method works best with sturdy, thick‑walled glasses that can tolerate low temperatures without cracking. Avoid freezing delicate crystal, as thermal shock may cause damage. After removal, handle the glasses with a cloth to prevent frost from transferring to the spirit.
Step 8: Apply a Cooling Sleeve or Stone Chiller
Cooling sleeves made of stainless steel or silicone can be wrapped around the glass to absorb cold from the freezer or ice bath. Alternatively, whiskey stones—typically made of soapstone or stainless steel—can be chilled and placed in the glass for a brief period. These tools provide a subtle chill without diluting the spirit, making them suitable for high‑proof liquors where temperature moderation is desired rather than full refrigeration.
Step 9: Store Glasses in a Wine Cooler Cabinet
A wine cooler cabinet offers precise temperature control for both the beverage and the glassware. Set the cabinet to the desired serving temperature, and store the glasses inside for at least 30 minutes before use. This method ensures uniform chill and eliminates the need for separate chilling devices. While the initial investment is higher, the consistent results are valuable for professional tasting rooms or serious collectors.
Tips & Pro Tips
- Always handle chilled glasses with a cloth or silicone grip to avoid frostbite.
- Do not over‑freeze plastic tumblers; follow manufacturer instructions to prevent warping.
- For spirits that benefit from slight warmth (e.g., aged rum), use a brief chill followed by a brief warm‑up period to release aromatic compounds.
- Combine methods—pre‑cool in the freezer, then finish with a brief dip in a chilled chiller—for maximum temperature stability.
Troubleshooting
- Glass feels too cold and numbs the palate: Allow the glass to sit at room temperature for one to two minutes before pouring.
- Ice water drips into the spirit: Use a dry cloth barrier or switch to a non‑diluting chiller such as the VoChill.
- Freezable cups develop cracks: Ensure they are placed upside‑down in the freezer as recommended by the manufacturer to allow even gel expansion.
Conclusion
By applying the nine methods outlined above, one can reliably chill glasses for fine spirits tasting, thereby enhancing aroma and flavor. The guide has demonstrated how to select appropriate glassware, employ dedicated chillers, use freezable gel cups, and implement classic ice techniques. Readers are encouraged to experiment with the recommended tools and adapt the methods to their personal tasting environment.
Products Mentioned in This Guide
Frequently Asked Questions
Why should I chill glasses before tasting fine spirits?
Chilling controls temperature, preserving delicate aromas and preventing rapid volatilization of flavor compounds.
What glassware is ideal for chilling when tasting whiskey versus brandy?
Use a Glencairn‑style glass for whiskey to concentrate aromas, and a narrow‑rimmed brandy snifter for gentle diffusion.
Which tools help chill glasses quickly and effectively?
Dedicated glass chillers, freezable tumblers, cooling sleeves, stone chillers, and ice buckets with tongs are all effective options.
How long should I pre‑chill glasses in the freezer?
Place glasses in the freezer for 10–15 minutes for a noticeable chill without risking cracks.
How can I avoid condensation diluting my spirit after chilling the glass?
Wipe the exterior with a clean cloth before pouring to remove moisture that could drip into the drink.